- authenticate/providers: add group support to azure
- authenticate/providers: add group support to google
- authenticate/providers: add group support to okta
- authenticate/providers: add group support to onelogin
- {authenticate/proxy}: change default cookie lifetime timeout to 14 hours
- proxy: sign group membership
- proxy: add group header
- deployment: add CHANGELOG
- deployment: fix where make release wasn’t including version
17 KiB
| title | description |
|---|---|
| Identity Providers | This article describes how to connect Pomerium to third-party identity providers / single-sign-on services. You will need to generate keys, copy these into your promerium settings, and enable the connection. |
Identity Provider Configuration
This article describes how to configure Pomerium to use a third-party identity service for single-sign-on.
There are a few configuration steps required for identity provider integration. Most providers support OpenID Connect which provides a standardized identity and authentication interface.
In this guide we'll cover how to do the following for each identity provider:
- Set a Redirect URL pointing back to Pomerium.
- Generate a Client ID and Client Secret.
- Configure Pomerium to use the Client ID and Client Secret keys.
Azure Active Directory
If you plan on allowing users to log in using a Microsoft Azure Active Directory account, either from your company or from external directories, you must register your application through the Microsoft Azure portal. If you don't have a Microsoft Azure account, you can signup for free.
You can access the Azure management portal from your Microsoft service, or visit https://portal.azure.com and sign in to Azure using the global administrator account used to create the Office 365 organization.
::: tip
There is no way to create an application that integrates with Microsoft Azure AD without having your own Microsoft Azure AD instance.
:::
If you have an Office 365 account, you can use the account's Azure AD instance instead of creating a new one. To find your Office 365 account's Azure AD instance:
- Sign in to Office 365.
- Navigate to the Office 365 Admin Center.
- Open the Admin centers menu drawer located in the left menu.
- Click on Azure AD.
This will bring you to the admin center of the Azure AD instance backing your Office 365 account.
Create a new application
Login to Microsoft Azure and choose Azure Active Directory from the sidebar.

Then under MANAGE, select App registrations.

Then click on the + ADD button to add a new application.
Enter a name for the application, select Web app/API as the Application Type, and for Sign-on URL enter your application URL.

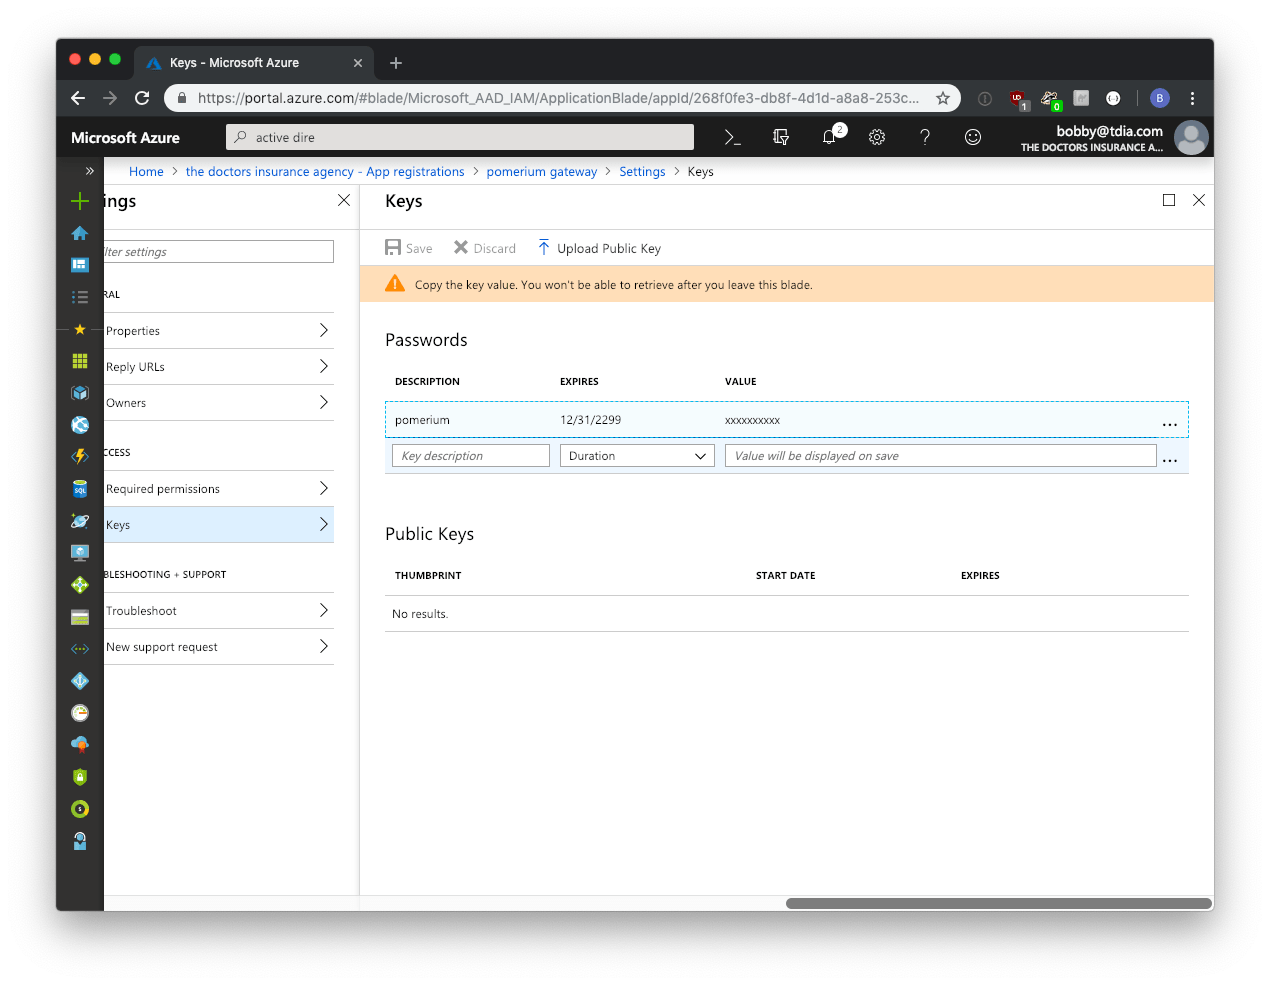
Next you will need to create a key which will be used as the Client Secret in Pomerium's configuration settings. Click on Keys from the Settings menu.
Enter a name for the key and choose the desired duration.
::: tip
If you choose an expiring key, make sure to record the expiration date in your calendar, as you will need to renew the key (get a new one) before that day in order to ensure users don't experience a service interruption.
:::
Click on Save and the key will be displayed. Make sure to copy the value of this key before leaving this screen, otherwise you may need to create a new key. This value is used as the Client Secret.
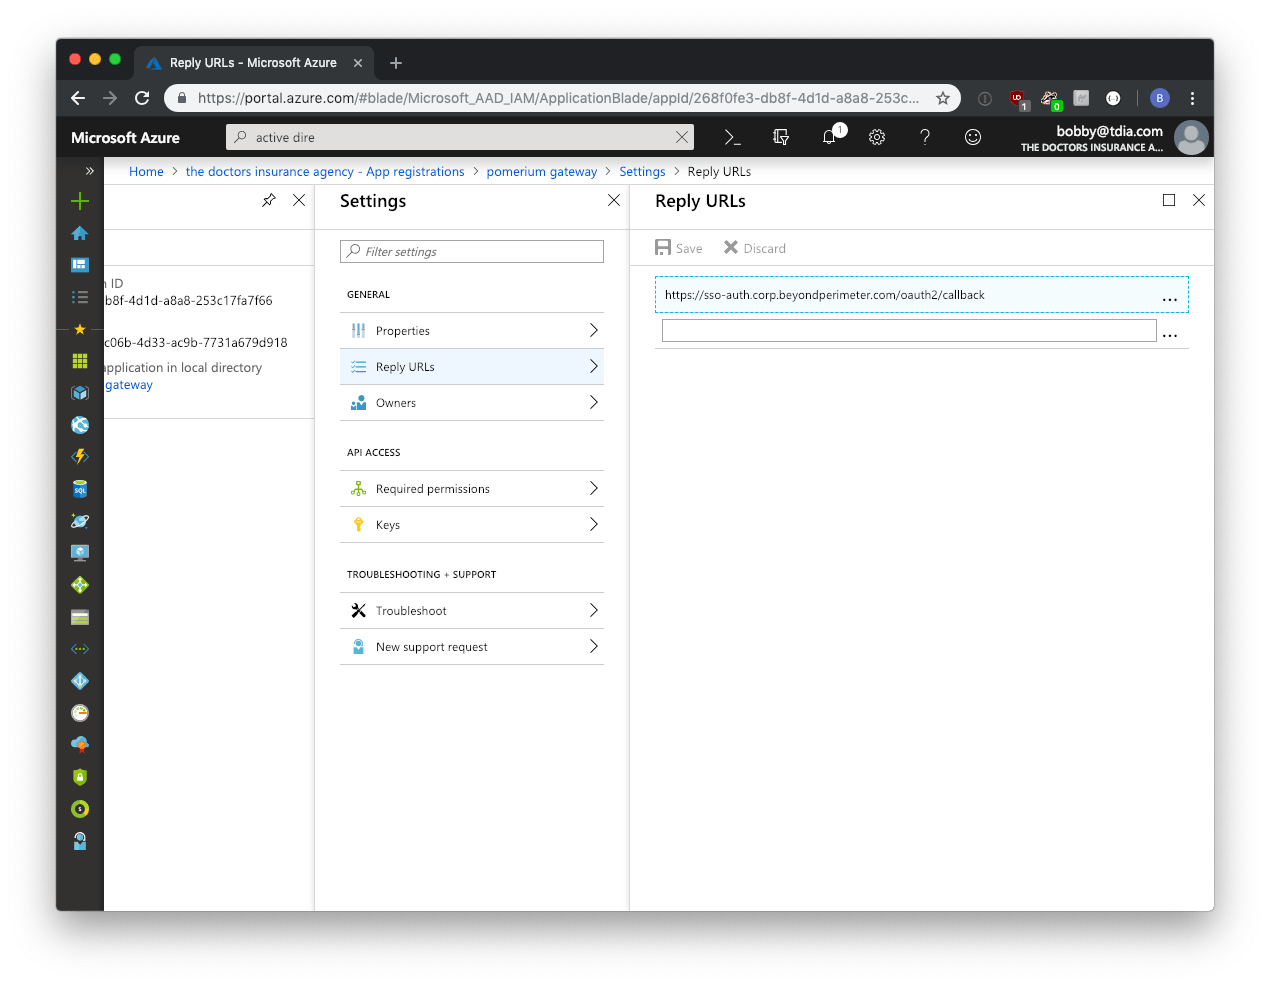
Next you need to ensure that the Pomerium's Redirect URL is listed in allowed reply URLs for the created application. Navigate to Azure Active Directory -> Apps registrations and select your app. Then click Settings -> Reply URLs and add Pomerium's redirect URL. For example, https://sso-auth.corp.beyondperimeter.com/oauth2/callback.
Next, in order to retrieve group information from Active Directory, we need to enable the necessary permissions for the Microsoft Graph API.
On the App registrations page, click API permissions. Click the Add a permission button and select Microsoft Graph API, select Delegated permissions. Under the Directory row, select the checkbox for Directory.Read.All.

You can also optionally select grant admin consent for all users which will suppress the permission screen on first login for users.
The final, and most unique step to Azure AD provider, is to take note of your specific endpoint. Navigate to Azure Active Directory -> Apps registrations and select your app.

Click on Endpoints

The OpenID Connect Metadata Document value will form the basis for Pomerium's Provider URL setting.
For example if the Azure OpenID Connect url is:
https://login.microsoftonline.com/0303f438-3c5c-4190-9854-08d3eb31bd9f/v2.0/.well-known/openid-configuration`
Pomerium Identity Provider URL would be
https://login.microsoftonline.com/0303f438-3c5c-4190-9854-08d3eb31bd9f/v2.0
Configure Pomerium
Finally, configure Pomerium with the identity provider settings retrieved in the pervious steps. Your environmental variables should look something like:
# Azure
REDIRECT_URL="https://sso-auth.corp.beyondperimeter.com/oauth2/callback"
IDP_PROVIDER="azure"
IDP_PROVIDER_URL="https://login.microsoftonline.com/{REPLACE-ME-SEE-ABOVE}/v2.0"
IDP_CLIENT_ID="REPLACE-ME"
IDP_CLIENT_SECRET="REPLACE-ME"
Gitlab
:::warning
Support was removed in v0.0.3 because Gitlab does not provide callers with a user email, under any scope, to a caller unless that user has selected her email to be public. Pomerium until this gitlab bug is fixed.
:::
Log in to your Gitlab account and go to the APIs & services.
Navigate to User Settings then Applications using the left-hand menu.
On the Applications page, add a new application by setting the following parameters:
| Field | Description |
|---|---|
| Name | The name of your web app |
| Redirect URI | Redirect URL (e.g.https://auth.corp.example.com/oauth2/callback) |
| Scopes | Must select read_user and openid |
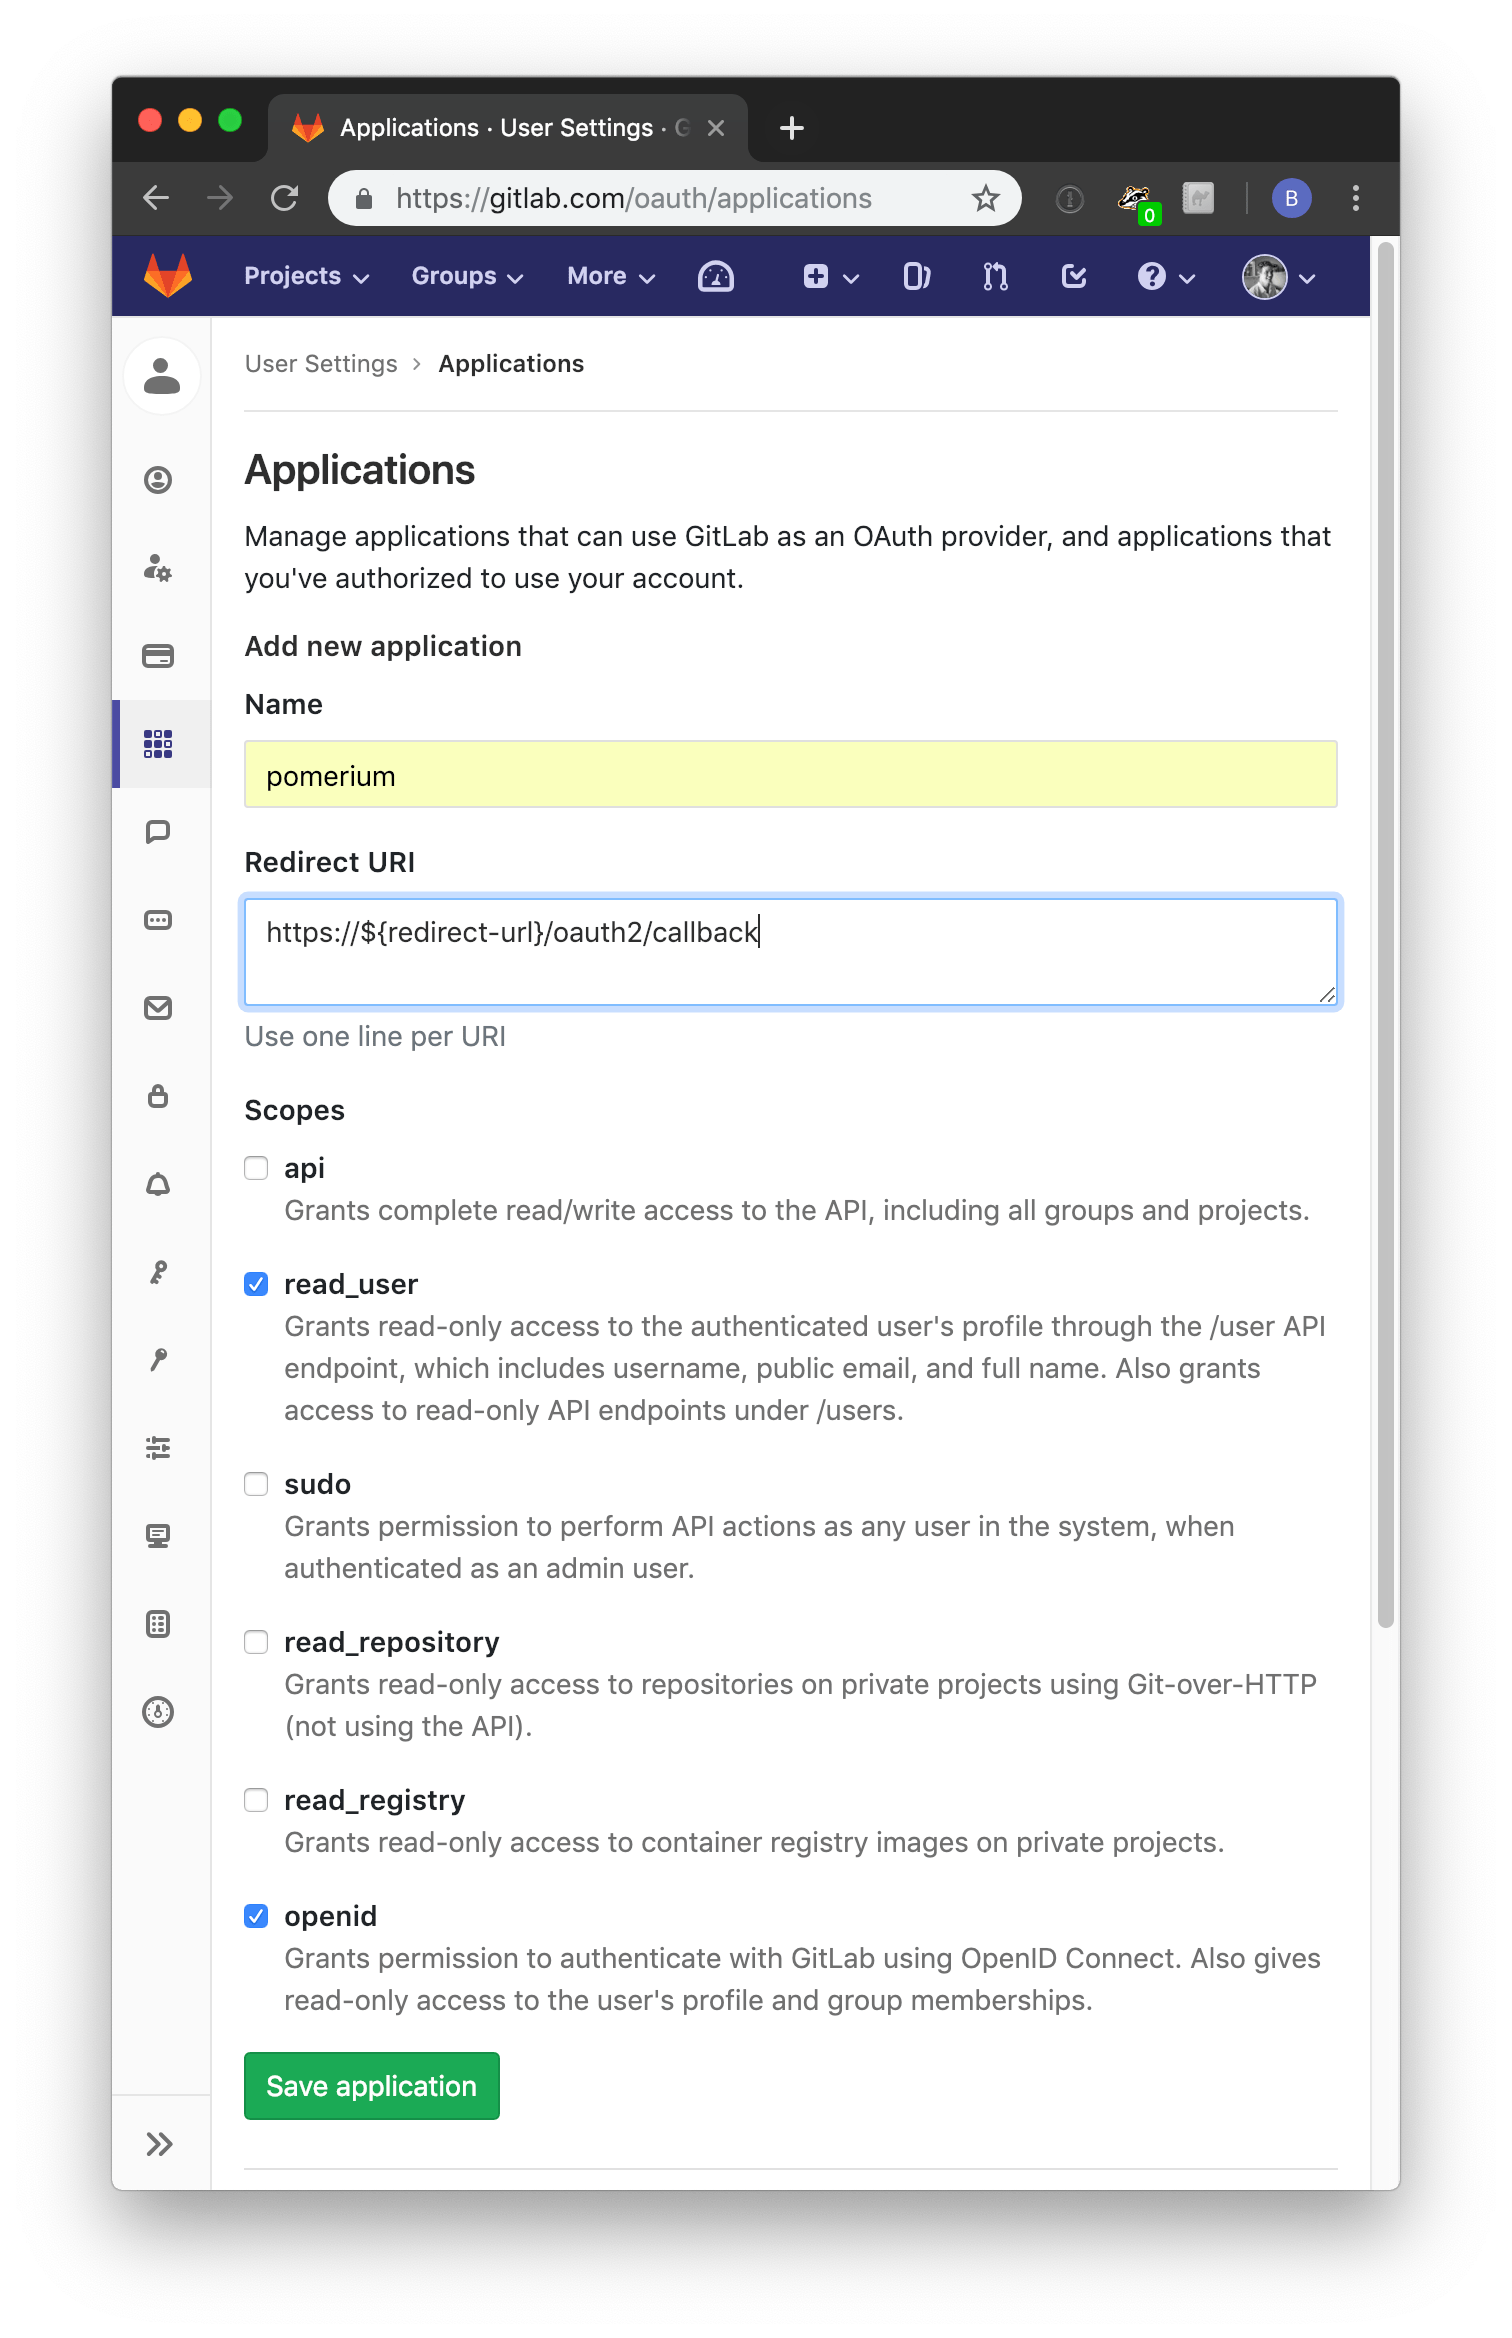
1.Click Save Application to proceed.
Your Client ID and Client Secret will be displayed:
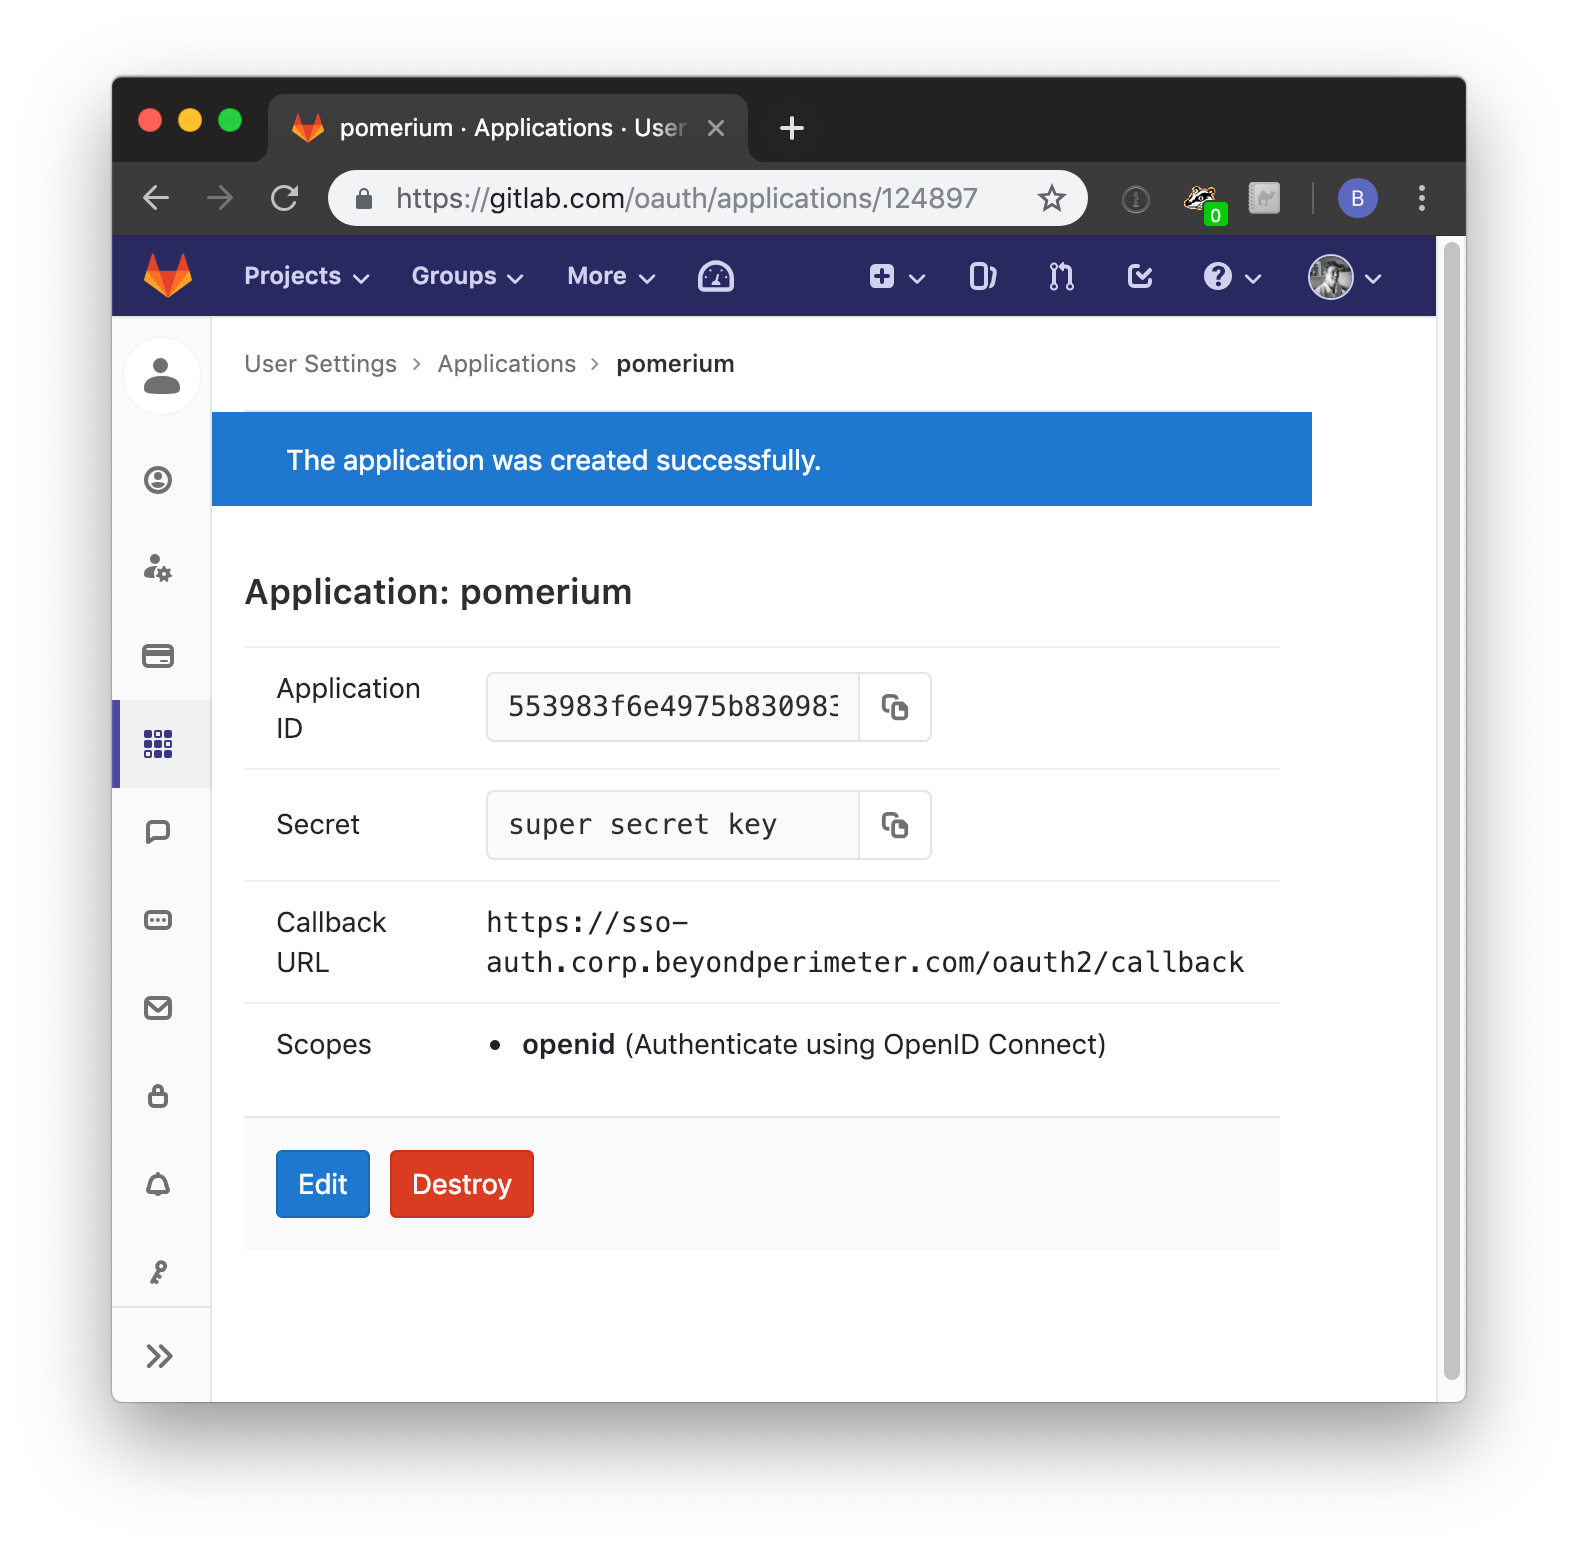
Set Client ID and Client Secret in Pomerium's settings. Your environmental variables should look something like this.
REDIRECT_URL="https://sso-auth.corp.beyondperimeter.com/oauth2/callback"
IDP_PROVIDER="gitlab"
# NOTE!!! Provider url is optional, but should be set if you are running an on-premise instance
# defaults to : https://gitlab.com, a local copy would look something like `http://gitlab.corp.beyondperimeter.com`
IDP_PROVIDER_URL="https://gitlab.com"
IDP_CLIENT_ID="yyyy"
IDP_CLIENT_SECRET="xxxxxx"
When a user first uses Pomerium to login, they will be presented with an authorization screen similar to the following.

Log in to your Google account and go to the APIs & services. Navigate to Credentials using the left-hand menu.

On the Credentials page, click Create credentials and choose OAuth Client ID.

On the Create Client ID page, select Web application. In the new fields that display, set the following parameters:
| Field | Description |
|---|---|
| Name | The name of your web app |
| Authorized redirect URIs | Redirect URL (e.g.https://auth.corp.example.com/oauth2/callback) |

Click Create to proceed. The Client ID and Client Secret settings will be displayed for later configuration with Pomerium.

In order to have Pomerium validate group membership, we'll also need to configure a service account with G-suite domain-wide delegation enabled.
- Open the Service accounts page.
- If prompted, select a project.
- Click Create service account. In the Create service account window, type a name for the service account, and select Furnish a new private key and Enable Google Apps Domain-wide Delegation.
- Then click Save.

Then, you'll need to manually open an editor add an impersonate_user key to the downloaded public/private key file. In this case, we'd be impersonating the admin account user@pomerium.io.
::: warning
You MUST add the impersonate_user field to your json key file. Google requires that service accounts act on behalf of another user.
:::
{
  "type": "service_account",
  "client_id": "109818058799274859509",
  ...
  "impersonate_user": "user@pomerium.io"
  ...
}
The base64 encoded contents of this public/private key pair json file will used for the value of the IDP_SERVICE_ACCOUNT configuration setting.
Next we'll delegate G-suite group membership access to the service account we just created .
- Go to your G Suite domain's Admin console.
- Select Security from the list of controls. If you don't see Security listed, select More controls 1. from the gray bar at the bottom of the page, then select Security from the list of controls.
- Select Advanced settings from the list of options.
- Select Manage API client access in the Authentication section.
- In the Client name field enter the service account's Client ID.
- In the One or More API Scopes field enter the following list of scopes:
https://www.googleapis.com/auth/admin.directory.group.readonlyhttps://www.googleapis.com/auth/admin.directory.user.readonly - Click the Authorize button.

Your environmental variables should look something like this.
REDIRECT_URL="https://sso-auth.corp.beyondperimeter.com/oauth2/callback"
IDP_PROVIDER="google"
IDP_PROVIDER_URL="https://accounts.google.com"
IDP_CLIENT_ID="yyyy.apps.googleusercontent.com"
IDP_CLIENT_SECRET="xxxxxx"
IDP_SERVICE_ACCOUNT="zzzz" # output of `cat service-account-key.json | base64`
Okta
Log in to your Okta account and head to your Okta dashboard. Select Applications on the top menu. On the Applications page, click the Add Application button to create a new app.

On the Create New Application page, select the Web for your application.

Next, provide the following information for your application settings:
| Field | Description |
|---|---|
| Name | The name of your application. |
| Base URIs (optional) | The domain(s) of your application. |
| Login redirect URIs | Redirect URL (e.g.https://auth.corp.example.com/oauth2/callback). |
| Group assignments (optional) | The user groups that can sign in to this application. |
| Grant type allowed | You must enable Refresh Token. |

Click Done to proceed. You'll be taken to the General page of your app.
Go to the General page of your app and scroll down to the Client Credentials section. This section contains the Client ID and Client Secret to be used in the next step.

Next, we'll configure Okta to pass along a custom OpenID Connect claim to establish group membership. To do so, click the API menu item, and select Authorization Servers.

Select your desired authorization server and navigate to the claims tab. Click Add Claim and configure the group claim for ID Token as follows.

| Field | Value |
|---|---|
| Name | groups |
| Include in token type | ID Token, Always. |
| Value Type | Groups |
| Filter | Matches regex .* |
| Include in | Any scope |
Add an another, almost identical, claim but this time for Access Token.
| Field | Value |
|---|---|
| Name | groups |
| Include in token type | Access Token, Always. |
| Value Type | Groups |
| Filter | Matches regex .* |
| Include in | Any scope |

Finally, configure Pomerium with the identity provider settings retrieved in the pervious steps. Your environmental variables should look something like this.
REDIRECT_URL="https://sso-auth.corp.beyondperimeter.com/oauth2/callback"
IDP_PROVIDER="okta"
IDP_PROVIDER_URL="https://dev-108295-admin.oktapreview.com/"
IDP_CLIENT_ID="0oairksnr0C0fEJ7l0h7"
IDP_CLIENT_SECRET="xxxxxx"
OneLogin
Log in to your OneLogin account and head to the dashboard.
Click Apps on the top menu. Select the Add apps menu item.

On the Find Application page, search for openid. Select Openid Connect by OneLogin, Inc.

On the App Configuration page, name the app and select a logo. Select Save.
![]()
Next, set set the Redirect URI's setting to be Pomerium's redirect url.

Go to the SSO page. This section contains the Client ID and Client Secret you'll use to configure Pomerium.
Set the application type to Web and the token endpoint to be POST.
Under Token Timeout settings set Refresh Token to 60 minutes (or whatever value makes sense for your organization). Note, however, if you don't enable refresh tokens the user will be prompted to authenticate whenever the access token expires which can result in a poor user experience.

OneLogin's OIDC implementation supports the groups which can return either the user's group or role which can be used within pomerium to enforced group-based ACL policy.
To return the user's Active Directory field, configure the group to return member_of. In the Default if no value field, select User Roles and Select Semicolon Delimited in the adjacent field. Select Save

Alternatively, groups can return the roles a user is assigned. In the Default if no value field, select User Roles and Select Semicolon Delimited in the adjacent field. Select Save

Finally, configure Pomerium with the identity provider settings retrieved in the pervious steps. Your environmental variables should look something like this.
REDIRECT_URL="https://auth.corp.beyondperimeter.com/oauth2/callback"
IDP_PROVIDER="onelogin"
IDP_PROVIDER_URL="https://openid-connect.onelogin.com/oidc"
IDP_CLIENT_ID="9e613ce0-1622-0137-452d-0a93c31f8392142934"
IDP_CLIENT_SECRET="3e86ef0cc21b6dcf10c1d91e032568617d37e9fe1609ffd8042d3c25a560c36c"
After reloading Pomerium, you should be able to see any login events from your OneLogin events dashboard.
